Painting Pixels: Lambert Shading from Scratch
I spent three days on pixels. Worth it.
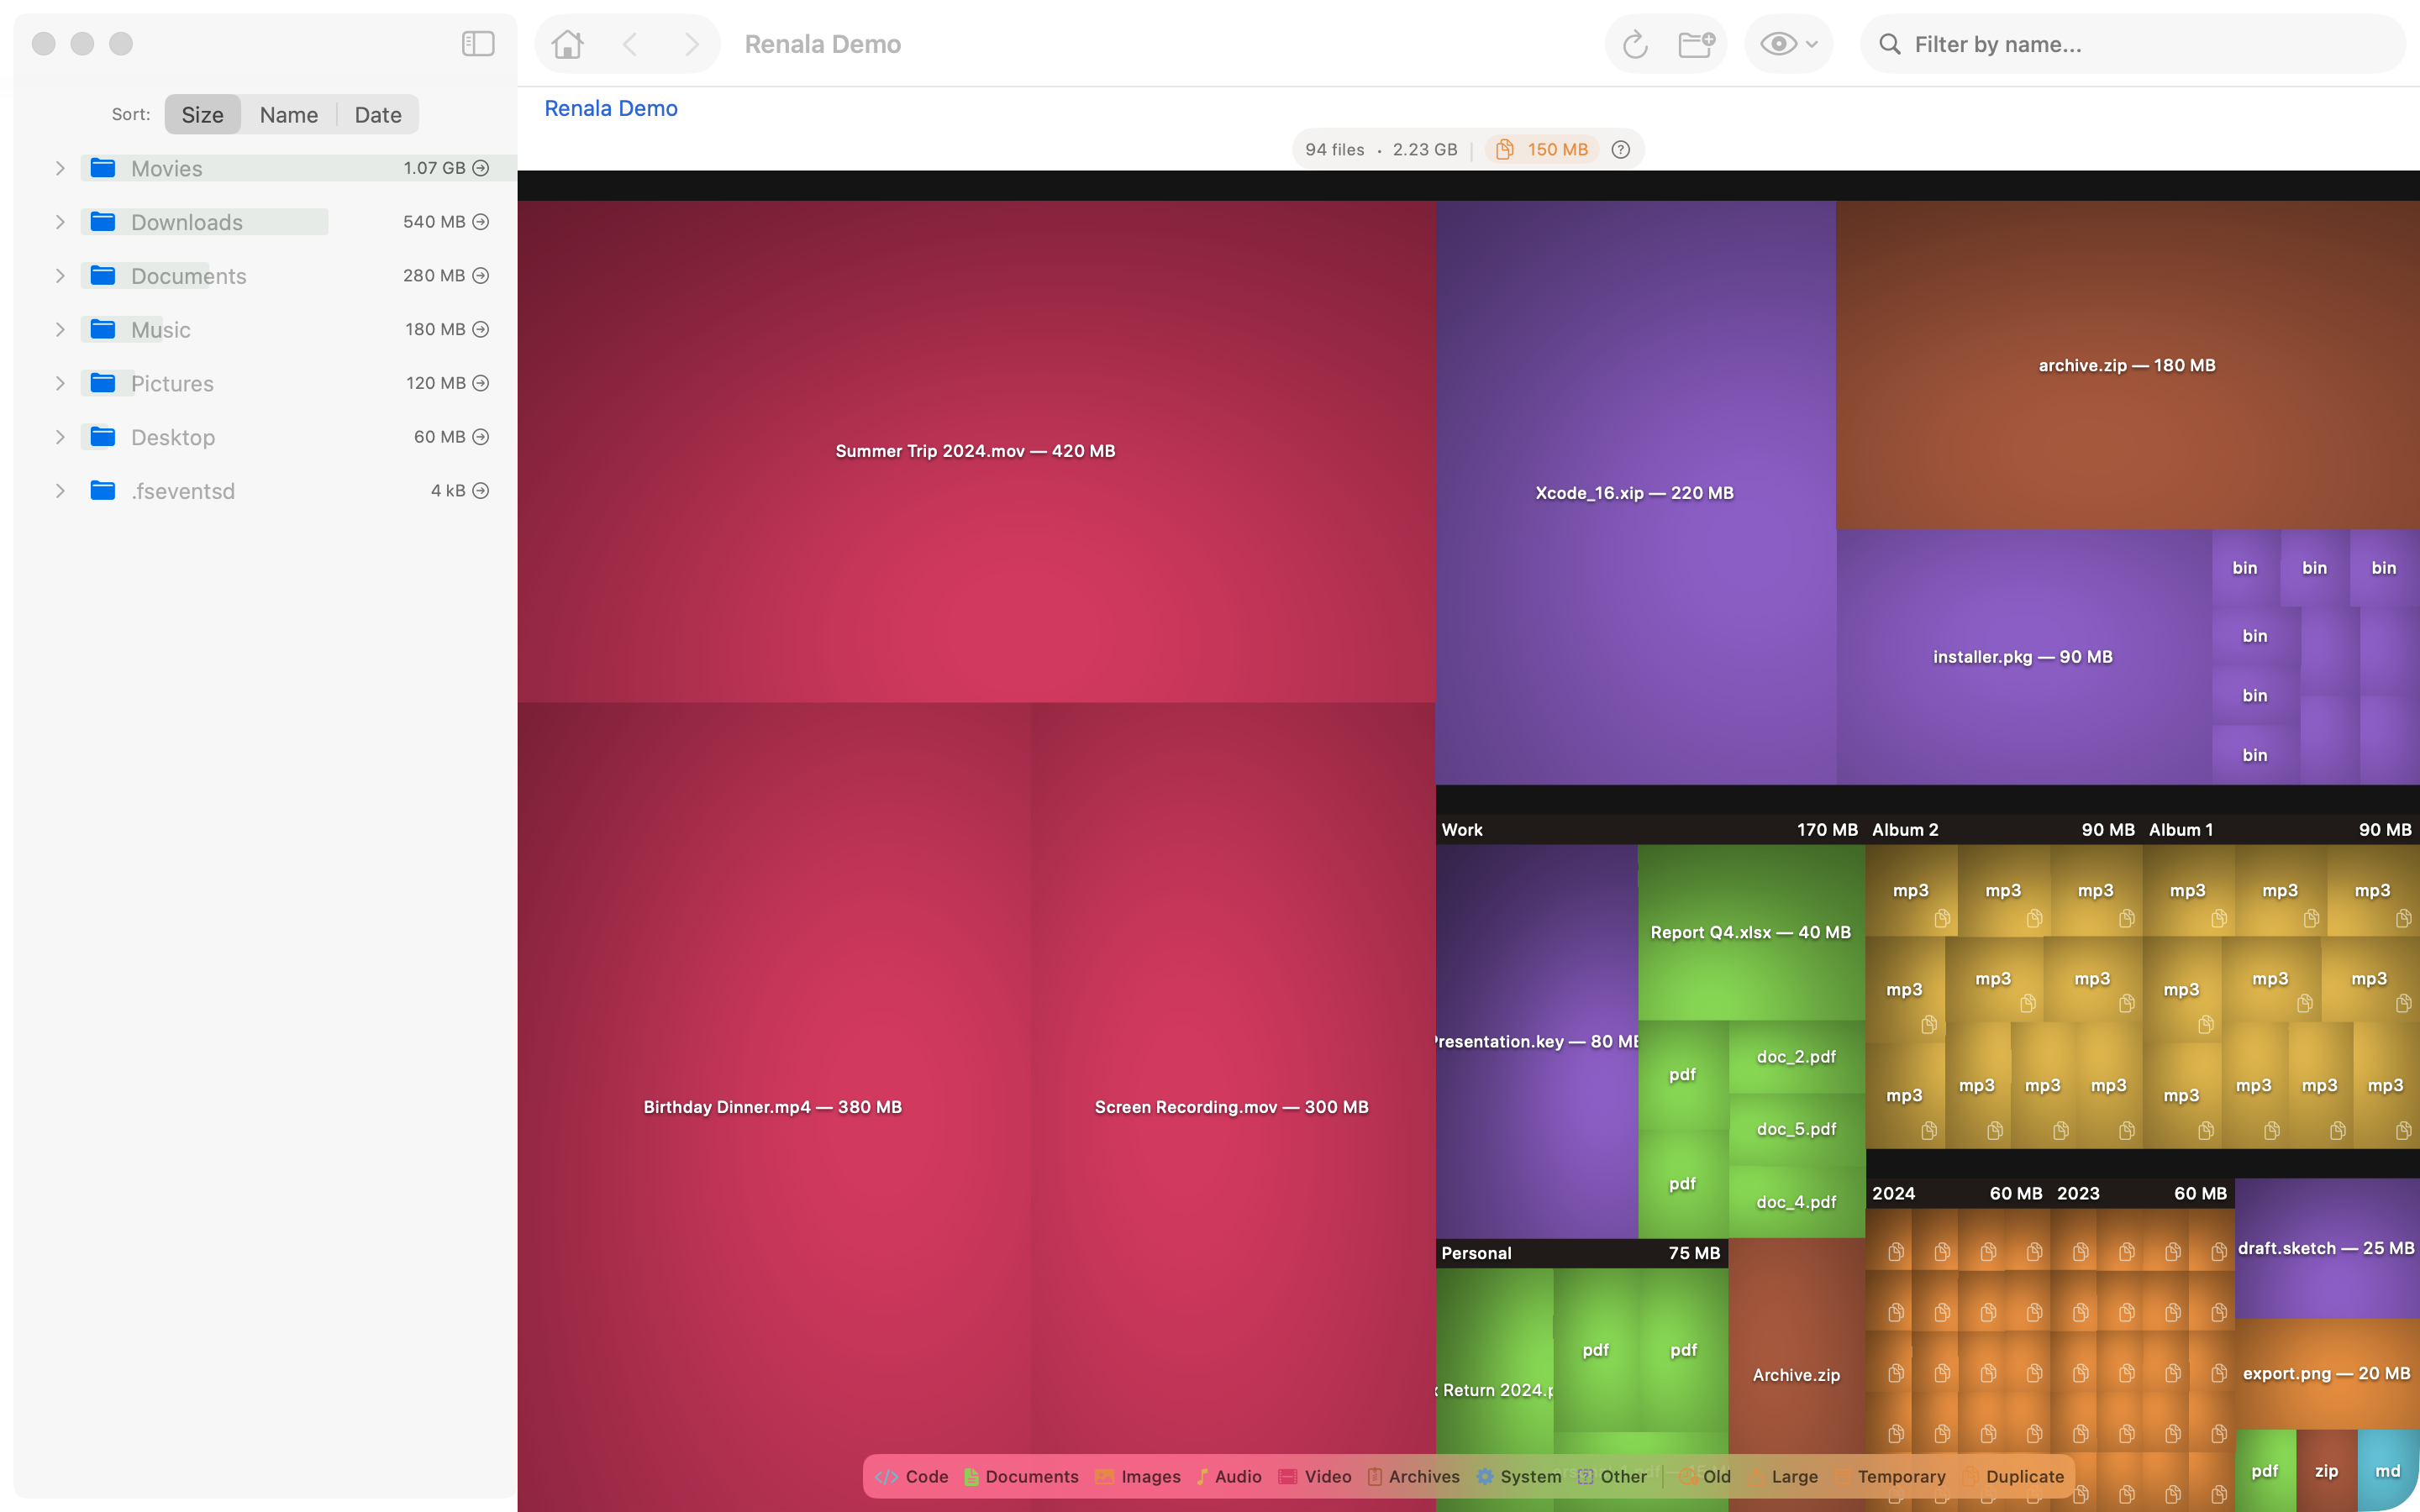
Early in the project, when the treemap was first rendering real data, the result was technically correct and visually wrong. Flat colored rectangles, no depth, no texture, no visual hierarchy. Nothing about the image suggested that some boxes were inside others, that you were looking at a nested structure, that the shape of the layout encoded information about your filesystem.
The result looked more like a colored grid than a disk analyzer.
Every disk analyzer that looks good uses cushion rendering: a shading technique that makes each rectangle look slightly raised, like a pillow, creating depth and hierarchy from a flat 2D surface. I had read about it but not implemented it, assuming the layout was harder.
The layout was not harder. The shading was. Three days for a cosine function. I am not a fast programmer.
Your eye already knows how light works. A surface facing the light is bright. A surface facing away is dark. Angled surfaces are somewhere in between. You process this in milliseconds, without thinking, every time you look at a physical object. Lambert shading is the math behind that instinct: the brightness at any point on a surface is the cosine of the angle between the surface normal and the direction to the light.
One rule. That is all it takes to make flat rectangles on a screen look like they have physical depth.
Rather than flat rectangles, each rectangle is modeled as a slightly convex surface, like a seat cushion. The center of the rectangle is the highest point. The edges are lower. The surface normal at any point inside the rectangle is computed from the gradient of this surface, which is a quadratic function of position.
Nested rectangles, which in the treemap correspond to directories containing files, accumulate cushion parameters from their ancestors. A file deep in a directory hierarchy inherits some cushioning from its parent directory, its grandparent directory, and so on. The result is that you can see the nesting structure directly in the shading: there are subtle ridges at directory boundaries, visible depth at every level.
The implementation requires generating a CGImage pixel by pixel.
SwiftUI’s Canvas API uses GraphicsContext commands: fill a path, stroke a line, draw an image. These are vector operations. There is no per-pixel API. If you want to compute the color of each pixel individually based on a mathematical formula, you are on your own.
The solution is to compute the pixel values yourself, outside of SwiftUI, and hand the result to Canvas as an image. You allocate a pixel buffer, fill it with computed RGBA values, and wrap it in a CGImage. Canvas then draws the CGImage as a single operation, fast and efficient, with no knowledge of how the pixels were produced.
The per-pixel loop is the core of this:
// Per-pixel Lambert shading (simplified)
for y in 0..<height {
    for x in 0..<width {
        // Surface normal from cushion gradient
        let nx = -(2 * cushionAx * Double(x) + cushionBx)
        let ny = -(2 * cushionAy * Double(y) + cushionBy)
        let nz = 1.0
        // Dot product with light direction
        let intensity = max(0, (nx * lx + ny * ly + nz * lz) / sqrt(nx*nx + ny*ny + nz*nz))
        // Modulate base color
        pixels[y * width + x] = baseColor.shaded(by: intensity)
    }
}
Move the sliders here to see exactly what each parameter does to the shading on a real rectangle, and hover over any pixel to inspect its surface normal, dot product, and final RGB value:
The cushion parameters (cushionAx, cushionBx, cushionAy, cushionBy) encode two things at once: the shape of this rectangle’s cushion and the accumulated contribution from every parent directory above it in the hierarchy. The light direction (lx, ly, lz) is a fixed normalized vector. At each pixel, the surface normal comes from the gradient of the quadratic height function, which makes it linear in x and y.
The dot product gives raw illumination. max(0, ...) clamps surfaces facing away from the light to zero. The base color comes from the file’s category (documents, images, video), and shaded(by:) scales its brightness.
For a 1600x1000 canvas with a dense treemap, this loop runs one to two million times per render.
One to two million pixel evaluations, each involving a square root and a dot product. Run that on the main thread and the entire UI freezes: no scrolling, no clicking, no response at all until every pixel is done.
The shading pipeline runs entirely on a background task. After the treemap layout computes the rectangles, a background task iterates over them, generates the CGImage for each, and caches the result. When the Canvas draws, it reads the cached images. The main thread work is a loop of context.draw(image, in: frame) calls: fast, no computation, just blitting pre-rendered images to the canvas.
graph TD
    A["TreemapLayout<br/>compute rects"] --> B["CushionRenderer<br/>compute surface params"]
    B --> C["Per-pixel loop<br/>Lambert shading"]
    C --> D["CGImage<br/>pixel buffer"]
    D --> E["Cache<br/>keyed by rectsVersion"]
    E --> F["Canvas.draw<br/>composite layers"]
    F --> G["Screen"]
    style E fill:#f5f0e8,stroke:#c47c2b
The cache invalidation is driven by a rectsVersion counter on the ViewModel. When the scan changes, the layout changes, the user applies a filter, or a color theme is switched, the counter increments. The background render task detects the new version and recomputes. The Canvas checks the version and redraws. The versions stay in sync.
Getting invalidation right took longer than the shading itself, which tells you everything about the relative difficulty of math versus state management. Missed invalidation produces stale images: you zoom into a directory and the colors from the previous render linger for half a second. Over-invalidation produces unnecessary recomputation: every mouse move triggers a full re-render and the CPU runs hot. The rule is that rectsVersion must track exactly the set of inputs that affect pixel colors or layout geometry, no more, no less.
The cushion model handles visual hierarchy.
The treemap has two kinds of rectangles. Files are leaves: they have no children. Directories are internal nodes: their children are nested inside them. The layout algorithm places child rectangles inside parent rectangles, with some margin. The shading needs to make this hierarchy visible.
The cushion parameter accumulation handles this automatically. When computing the cushion for a child rectangle, you start with the parent’s parameters and add the child’s own contribution on top. The parent rectangle has a gentle convexity across its full area. The child rectangle has its own convexity on top of that. The combined surface is higher in the center of the child, lower at the edges, with a visible step down at the boundary between parent and child. Directory nesting becomes physically visible as ridges and gradients.
You do not need to draw borders. You do not need to add drop shadows. The math does it for free. Cosines: underrated.
After the shading was in, it looked like a disk analyzer. The visual representation did its job: depth is hierarchy, area is size, color is category. The information is in the pixels, and for the first time, the pixels actually communicated it.
Three days. Worth it.
References
- van Wijk, J.J., van de Wetering, H. (1999). Cushion Treemaps: Visualization of Hierarchical Information. IEEE Symposium on Information Visualization.
- Wikipedia: Lambertian reflectance the cosine law and its derivation
- Wikipedia: Phong shading context for where Lambert fits among shading models
- Apple Developer: CGImage the raw pixel buffer abstraction used for custom rendering
- Apple Developer: Canvas the SwiftUI immediate-mode drawing API
- WWDC 2021: Add rich graphics to your SwiftUI app Canvas API,
TimelineView, custom drawing patterns - WWDC 2021: Explore SwiftUI animation animation and rendering fundamentals in SwiftUI